Clumsy Proof Craft
ok.
i have always loved doing crafts. it's enjoyable for me.
i love all kinds of paper, glitter, stickers, embellishments and pens!
i love all kinds of paper, glitter, stickers, embellishments and pens!
i grew up doing crafts with our neighbor lady and
all
our neighbor kids.
i know a thing or two.
and i would say i am creative, and
that i'm a really good decorator, and
have an eye for fashion.
but
let
me
tell
ya,
when it comes to doing crafts, taking pictures, drawing or painting,
i am a bit clumsy.
and this isn't really a crafter's blog but this craft is so satisfying, easy, and fun(you can't mess it up), that i really wanted to share it!
and i say that with a smile on my face!
i saw this super cute, cool craft idea from the lovely Hailey's blog!
and ya know what?
i actually did it. i mean i've done decoupaging plenty
in my life. i really love that.
and my artsy friend Ann has helped me create (a couple of years ago) two pieces of tiny little
art paintings on canvas:


my three masterpieces!
anyway so i gave this craft i found on Hailey's blog a try and it went great!
check it out.
all you need is:
1.) WOOD LETTERS (to spell out any word you want. i bought mine at Wal-mart b/c I don't have a Hobby Lobby near by)
the wood letters are under $2 a piece.
2.) HODGE PODGE
(basically a glue you can use under paper and over paper)

i typically use this brand, but any brand will do ya.
3.) FOAM PAINT BRUSHES
(you'll see them in the pics to come, they are super cheap, wal-mart again is fine)
4.)SCRAPBOOK PAPER
5.) GLITTER BABY!

getting ready; the little suitcase houses all my goodies (i have no idea why i have
the paint holder out, wow)

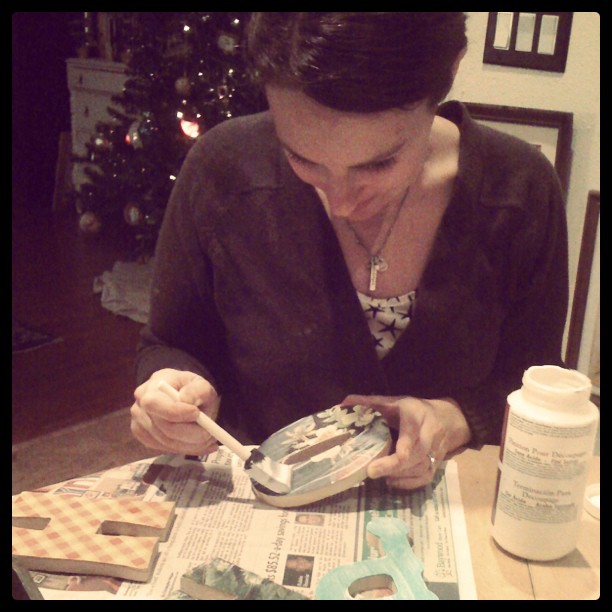
applying the mod podge to the wood letter right before the scrapbook paper gets applied.

applying the scrapbook paper after i've traced using the letter (with a pencil) to cut the shape of the letter-
then apply it with the Mod Podge and press and flatten down.

here is the "H" after i applied my chosen scrapbook piece. (isn't it cute)!?
once you have all your scrapbook paper applied on the letters, you coat them once or twice with the Mod Podge. let it dry (it dries really quickly, less than 5 minutes typically)


here are all my completed letters with the scrapbook paper mod podged on.

now i'm applying the mod podge around the edges of each letter and then you can apply the glitter. i just laid a piece of 8x10 down while i shook the glitter out onto the sticky mod podge edges, then shaking off the excess; (that way i can save the glitter by folding the piece of paper and putting the glitter back in it's container without waste.

look at that pretty "E"!

and "H"!

finished product! ( i got some glitter on the front of my "H", but i can get that off :)

how cute is my little craft?!
it would be a neat gift idea too!
(and a cinch to do with kiddos)
(and a cinch to do with kiddos)
just find out what someones favorite word is,
and go for it.
hope,
it's
such
a
sweet courageous essential
in our life.
christmas is hope.
christmas is hope.
Now faith is being sure of what we hope for and certain of what we do not see.
Hebrews 11:1
linking up with the inspiring:

and:

.JPG)

I love the HOPE! :) so cute!!
ReplyDeleteit turned out sooo cute! nice work!
ReplyDeleteAh, I love crafts too. These look amazing and so fun.
ReplyDeleteI'm so addicted to using Mod Podge in my crafting!
ReplyDeleteOh Gina... I love this. Perfect and beautiful and oh, so crafty! Nice work, my friend. So true... Christmas is all about HOPE. xoxo
ReplyDeleteI love that quote :)
ReplyDeletex
Marielle
this looks so fun to do! I wanna try it
ReplyDeleteYou are so cute! I love that idea! And that verse is one of my favs.
ReplyDeleteoh gina! love this :) thanks for sharing!
ReplyDeleteGina, what a great idea! Your post is beautifully done! Kudos my friend!!!
ReplyDeleteI LOVE those letters!! So adorable! ModPodge is the best stuff ever in my opinion!
ReplyDeleteawww!! Thank you Gina!! They look great! So fun, and you're simply adorable! I have since completed a set of "joy" and "love" letters, I'll put up more pics soon~
ReplyDeleteLOVE that! that is one of my FAVORITE verses, and i love your crafty art! you say it's clumsy proof, but i'm sure i could find a way to clumsy it up, but that's the beauty of it all...our messes is what makes us beautiful and lovely in His eyes:)
ReplyDeletep.s. you are stunning, dear!
oh my gosh i love it! so so cute.
ReplyDeleteYou know I just LOVE this! Glad to see this part of your creative side! I am a huge Modge Podge fan....I use it in so much of my art. It rocks.
ReplyDeleteSending you Christmas hugs!
This is a really cute craft idea. I've got some little wooden letters lying around as well as some scrapbook paper. I think this might be a cute x-mas gift idea for some kiddies. And now - I just saw a link to your Santorini page! muwahahaha Guess where I'm clicking next?! Love to see a good adventure!
ReplyDeleteLOVE IT!!
ReplyDelete